
Arduino is an open-source electronics platform based on easy-to-use hardware (Arduino boards), software (Arduino IDE), which allows to write programs and upload them to board (usually via USB connection) and an amazing community. In my opinion it’s a great tool to learn about microcontroller programming and for fast device prototyping. Arduino is not only for beginners. The strong community and thousands of open-source libraries helps all designers around the world for fast validation of their projects. I call this kind of methodology “Arduino-First”.
Getting started with Arduino is very easy. It should take less then 15 minutes for installing a software and burning a first example into the board.
What you need
- Arduino board (see the list of official boards)
- USB cable (usually of class B like for the printer)
- Computer with Linux, Mac OS X or Windows
- Arduino IDE
Step 1: Download and install Arduino IDE
Arduino developers have prepared multiple versions of the IDE for different operating systems. So, download the latest software of Arduino IDE dedicated to your OS from official download page. Unpack downloaded file (zip/tarball) and install the software.
- How to install Arduino IDE on Linux?
- How to install Arduino IDE on Mac OS?
- How to install Arduino IDE on Windows?
Step 2: Connect the Arduino Board to the computer
Once you have the Arduino IDE installed you can connect the arduino board to the computer using USB cable. Your system should recognize new device as a serial interface (Virtual COM Port). You can verify this on your OS. On Windows you can check the port number using a tool called “Device Manager”. On Linux and Mac OS, you can check the kernel logs using command-line tool “dmesg”.
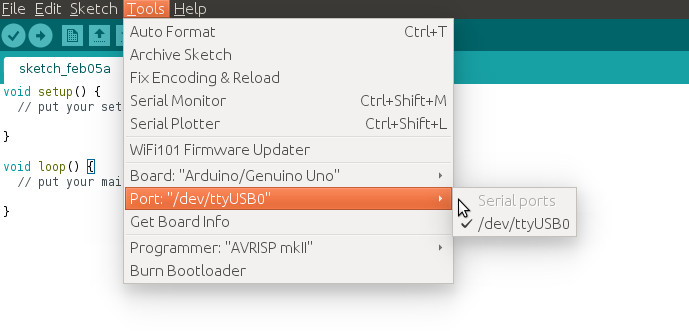
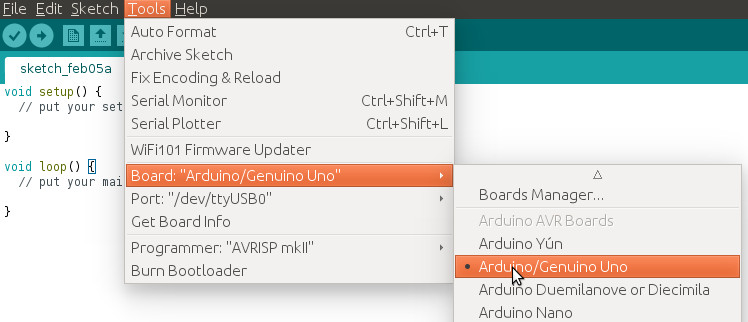
Step 3: Configure Arduino IDE
At this step you have Arduino board connected to your computer. Now, open Arduino IDE, go to “menu -> tools” then choose the type of your arduino board and select serial COM port (path on unix-like OS, number on Windows).
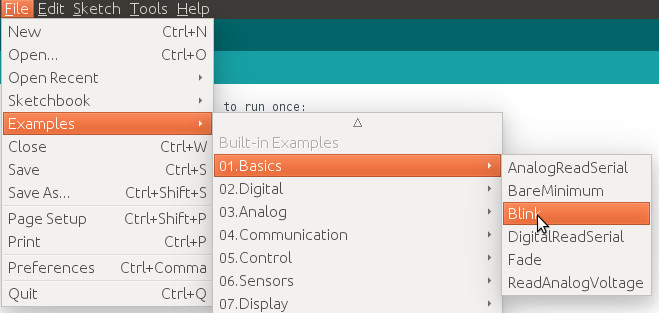
Step 4: Open, compile and upload Blink example
Arduino comes with a bunch of examples ready to load. Let’s open “Blink” example (a “Hello World” program for electronics). This example will make the onboard LED blink every second.
And now, verify the code and upload the firmware to Arduino board.

Ok, that would be all. Congratulations! You have burned your first program into the Arduino chip.